


Turn Your Ubuntu Intrepid Into Mac OSX Leopard
By
 This is an updated version of my previous post Turn Ubuntu Hardy into Mac OSX.
That post was written six months ago and many things have changed during this period of time: release of Ubuntu Intrepid, newer Mac4Lin theme, better globalmenu applet etc. As such, I have decided to rewrite this tutorial for the Intrepid platform.
Disclaimer: This tutorial was based on Ubuntu Intrepid and Mac4Lin RC1 themes. I don’t guarantee that it will work on other distro or other version of Ubuntu.
Download the Mac4Lin themes and extract it to your Home folder. You should see a Mac4Lin_v1.0_RC1 folder that contains all the configuration files in your Home directory.
Preparing the installation path
Next, in your Home directory, press Ctrl + H to reveal all the hidden files. Check if any of the three folders .themes, .fonts, .emerald exist. If not, create three folders and name them .themes, .fonts, .emerald. Create another folder within .emerald folder and name it themes.Installing the Mac4Lin themes
Open a terminal, type in:cd Mac4Lin_v1.0_RC1
sh Mac4Lin_Install_v1.0_RC.sh
This will install the Gnome themes (window border and icons), change the wallpaper and the panel background.sh Mac4Lin_Install_v1.0_RC.sh
During the installation process, the installer will ask you for root access in order to install certain components (refer to the image below). Type y to continue.

After the installation, your desktop should look something like this:

Installing the AWN dock
(The AWN dock may/may not work in all machine. If you find that it does not work after following the instructions below, you may want to try out Cairo dock that is less demanding on the machine.)The AWN dock requires a compositing manager to work. If your system supports Compiz, it will be able to run AWN as well. if not, we have to install the X compositing manager.
Go to System -> Preferences -> Appearance, click on the Visual Effects tab. Click on the Extra radio button. If you see the following image, then your computer does not support Compiz. (If you don’t see the image below, proceed directly to install AWN.)

You have to install the alternative X composition manager
sudo apt-get install xcompmgr
Add it to your auto-start list. Go to System -> Preferences -> Session. Add the following:
Install AWN
The AWN dock is already included in the Intrepid repository, so you can easily install it by clicking this link. Alternatively, you can also type the following command in the terminal:
sudo apt-get install avant-window-navigator
Once the installation is done, go to Preferences -> AWN Manager. On the left pane, click on the Themes. On the right, click Add. Navigate to the Mac4Lin_v1.0_RC1 folder. Open up the AWN folder and select Mac4Lin_AWN_v1.0_RC.tar.gz. Click Open. The AWN theme should be installed now. Check the radio button beside the theme and click Apply. Click Close.
Before we launch the AWN, we need to remove the bottom panel so that there won’t be an overlap. At the bottom panel, right-click the mouse and select Delete This Panel. Activate AWN by going to Applications -> Accessories -> Avant Window Navigator. You should see the AWN loading up in the bottom of the screen. To add applications to the dock, click on the Applications at the top panel and navigate to the particular application you want to add. Drag the application icon to the dock. That’s it. You should see something like the image below:

To start AWN everytime you log in, go to System -> Preferences -> Sessions. Click Add. Fill up the following:

Click Add, follow by Close. AWN will now automatically load when you login to your computer.
Installing OSX font
Go to System -> Preferences -> Appearance. Click on the Fonts tab Change the following field to the same as the image below:
Make sure the Subpixel smoothing (LCDs) button is checked. Click Close.
Installing Global menu
There is a repository for Ubuntu Intrepid that you can add to the sources.list, but it is not the updated version (0.6) and it is buggy. Instead, we will download the latest version (0.7.1) from the code homepage. In the future when the repository is updated to the newer and more stable version, I will update this post again.For 32-bit machine
Download gnome-globalmenu-0.7.1-1.fc10.i386.rpm to your Home folder from the Globalmenu Google code site.
Note that the file is of rpm format. We need to use alien to convert it to deb format.
In the terminal, type:
sudo apt-get install alien

sudo alien --scripts gnome-globalmenu-0.7.1-1.fc10.i386.rpm
For 64-bit machine
Open your text-editor (Applications -> Accessories -> Text Editor).
Copy and paste the following:
# Uncomment to load the GTK module

export GTK_MODULES=globalmenu-gnome

# Uncomment to tell the GTK module to open a Gtk

# TreeView for all menus in the application you start.

# export GNOMENU_FUN=1

# Uncomment to disable global menu.

# export GNOMENU_DISABLED=1

# Uncomment to print a lot of debugging messages

# export GNOMENU_VERBOSE=1

# Uncomment to save the debugging messages to the given file.

# export GNOMENU_LOG_FILE=/tmp/gnomenu.log

# uncomment to disable the plugin for specific programs.

# export GTK_MENUBAR_NO_MAC="fast-user-switch-applet"In your terminal,
gksu gedit /etc/apt/sources.list
Add the following line to the end of the file. Save and close.deb http://ppa.launchpad.net/globalmenu-team/ubuntu intrepid main
Back in your terminal,sudo apt-get update
sudo apt-get install gnome2-globalmenu
sudo apt-get install gnome2-globalmenu
Now, on the top panel, remove all the icons and menu from the left side of the panel. Right-click on the icon and select “Remove from panel”.On the right of the top panel, remove the logout icon. Still on the right hand side of the top panel, right click and select ‘Add to panel‘. Scroll down the list and add ‘Search for files‘. This will add the spotlight icon to the panel.

On the left of the top panel, right click and select ‘Add to panel‘. Scroll down the list and add Main Menu and Global Menu Panel Applet.

The Globalmenu might not appear or work well after you have added it. Logout and login again and you should see the globalmenu working perfectly on the top panel.
Right click on the globalmenu and select Preferences. Check “Enable Global Menu” and unchecked “Icon”.


The globalmenu is compatible with most of the GTK application. However, some programs, such as Firefox will not work with it.
Creating Dashboard effect
We will use a combination of screenlets and Compiz widget plugin to achieve the dashboard effect.If you have not installed Screenlets, click here to install.
If you have not installed Compiz Configuration Settings Manager, click here to install.
Alternatively, you can also type the following command in terminal to install:
sudo apt-get install screenlets compizconfig-settings-manager
Go to System->Preferences->CompizConfig Settings Manager. On the Left, click on Desktop. On the right, put a check beside ‘Widget layer’
Go to Applications –>Accessories->Screenlets. Activate the widgets that you want to display. Right click on the widget and select ‘Properties’. Go to Options tab and select ‘Treat as widget’. Do this for all the widgets that you have activated.

You can now see your dashboard in action by pressing F9.
Fixing up some small detail
Until now, your desktop should be very close to a Mac desktop, but there are still some small details such as the Gnome icon at the top panel, mouse cursor etc. Let’s fix them up now.Replace the apple logo
1. Download the apple icon (Right-click and select “save link as”).
2. Go to Places –> Home Folder. Press Ctrl + H to reveal the hidden files.
3. Navigate to /.icons/Mac4Lin_Icons_v1.0_RC/scalable/places. Scroll down to find the images distributor-logo.png, gnome-main-menu.png, main-menu.png and start-here.png. Note that all of them are the same image. Rename them to distributor-logo.png.old, gnome-main-menu.png.old, main-menu.png.old and start-here.png.old respectively.
4. Now, with the apple icon that you have downloaded, make four copies and rename them to distributor-logo.png, gnome-main-menu.png, main-menu.png and start-here.png. Copy and paste all of them to the folder.
5. Logout and login again. The logo at the top panel should change to the apple icon now.
Changing mouse cursor
Go to System –> Preferences –> Appearance. Select Customize. Click on the Pointer tab. Select Mac4Lin_Cursors_v1.0_RC. Click Close.
Configuring usplash screen
Until now, you have done up the interior, it’s time to fix the exterior: usplash screen and grub screen.Install startupmanager by clicking here or type the following command in the terminal:
sudo apt-get install startupmanager
Go to System -> Administration -> Startup-Manager. Click on the Appearance tab.
Press the Manage bootloader themes button. This will pop up a window allowing you to select the background image for the GRUB.

Click on the Add button and navigate to File System –> Home –> Username –> Mac4Lin_v1.0_RC1 –> GRUB. You should see three files. Refer to the below screenshots on how each file looks like. Pick the one that you like best.


Back to the main window, select the image from the drop down bar. Remember to check the box “Use background image for bootloader menu”.
There is a bug in Ubuntu Intrepid that prevent the user from changing the usplash screen. We have to do a workaround using splashy. Here’s the hack for it:
Remove the default usplash
sudo apt-get autoremove usplash
Download these two files to your desktop:libsplashy1_0.3.10-1_i386.deb
splashy_0.3.10-1_i386.deb
Double-click the downloaded files to install.
Download the osx-splash splashy theme file to your Home folder.
In your terminal,
sudo splashy_config –i ~/osx-splash.tar.gz
sudo mv /etc/splashy/config.xml /etc/splashy/config.xml.old
sudo cp /etc/splashy/themes/osx-splash/config.xml /etc/splashy/config.xml
Now, we need to edit the GRUB filesudo mv /etc/splashy/config.xml /etc/splashy/config.xml.old
sudo cp /etc/splashy/themes/osx-splash/config.xml /etc/splashy/config.xml
gksu gedit /boot/grub/menu.lst
Scroll down till you find the kernel entry. Append the term vga=792 to the end of the kernel line (see screenshot below). Save and close.
That’s it.
Complete Screenshots
Grub screenLogin screen

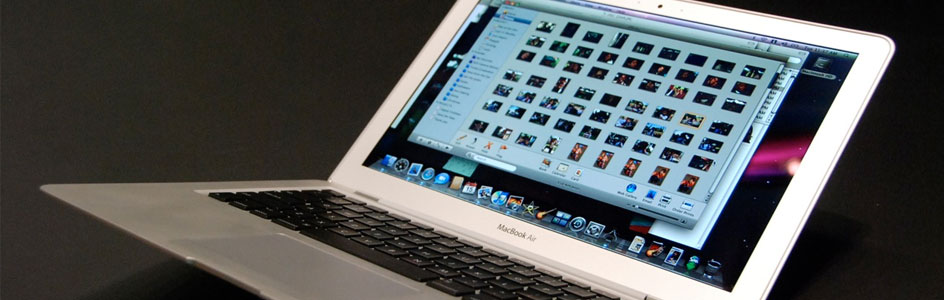
Intrepid Mac OSX desktop

Intrepid Mac OSX desktop with dashboard effect

Uninstallation
If you want to change the theme back to the original setting, here is what you need to do:1. Remove the globalmenu from the top panel
2. Remove all the installed files:
sudo apt-get autoremove splashy libsplashy1 gnome-globalmenu
3. Restore the usplash theme and remove the vga=792 from the GRUB file.sudo apt-get install usplash
4. Uninstall the Mac4Lin themescd Mac4Lin_v1.0_RC
sh Mac4Lin_Uninstall_v1.0_RC.sh
sh Mac4Lin_Uninstall_v1.0_RC.sh


